
Following on from my previous post about renovating our garden, I wanted to write an entry about another project we’ve recently completed.
Our home is a Victorian townhouse over three storeys, but the top floor has only one bedroom and a bathroom. The rest of that floor is essentially attic (or loft) space, accessible through a hatch in the ceiling of the middle floor.
As such, the loft is quite long, and far too big for us to use as-is. In fact, I’m a big believer in that if you need to put something in the loft then you probably don’t actually need it at all. I’m pretty sure we only have Christmas decorations stored up there.
This felt like a big waste of space! The loft was a decent height and one could (mostly) stand up in some of it. It also had old fashioned windows in the pitched roof - I have no idea why.
Based on this, we thought we’d try to convert half of the loft into actually usable house space.
The rest of this post briefly describes what we did to accomplish this.
Accessing the new “room”
The stairway up to the top floor has a switchback in it. The mini landing at the switch point happens to be at the same level as the loft floor, and we were able to knock through the wall on that landing in order to reveal the loft behind.
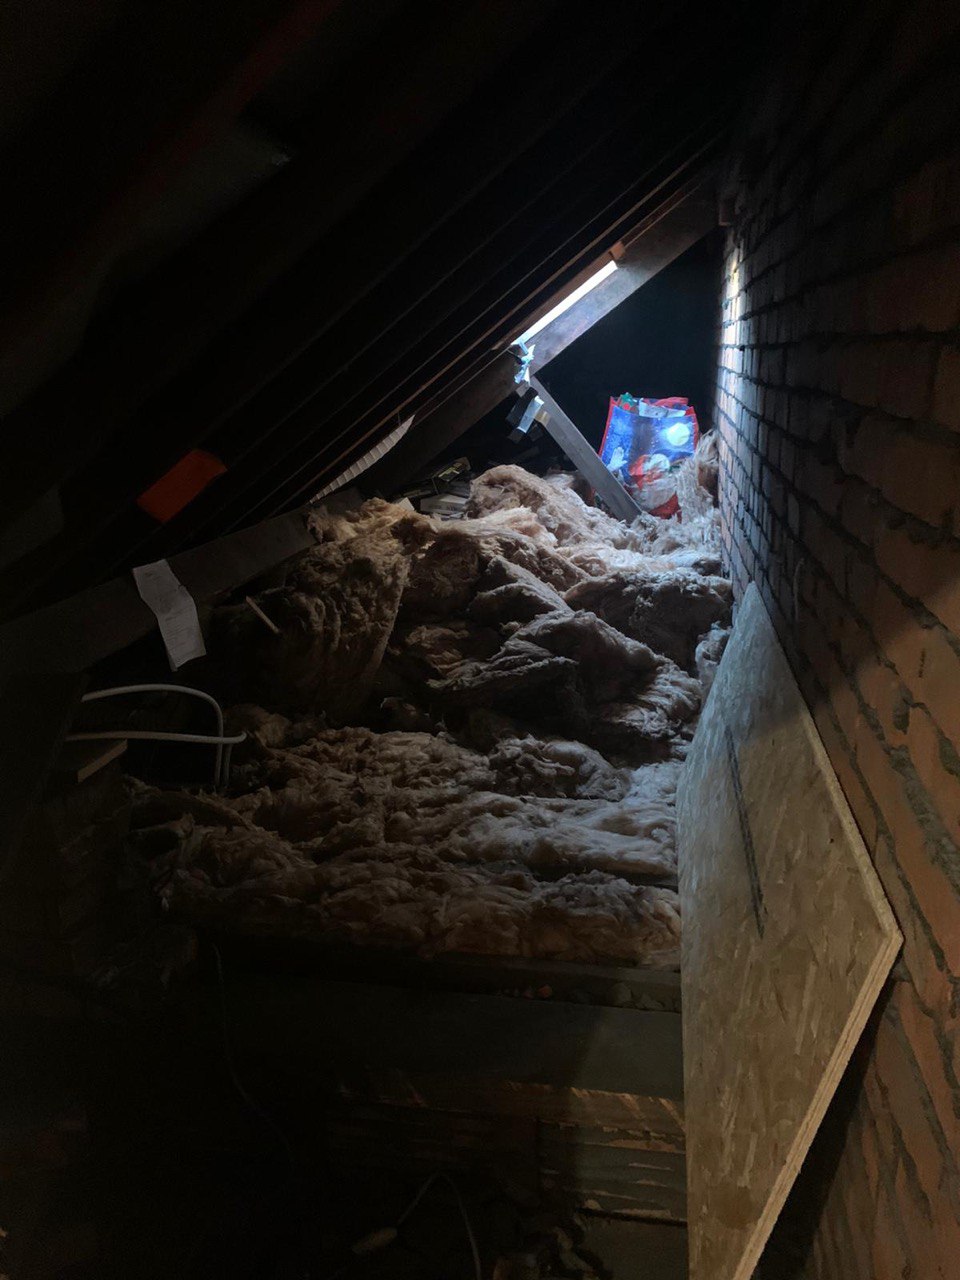
Knocking through the loft wall
As we knocked through, we revealed the loft space. You can see the windows, roof beams and insulation (along with promised bag of Christmas decorations) in the image below. Sorry it’s a bit dark.
Adding a door
Since the aim was to create a bedroom, we needed to add a door (for obvious privacy reasons). Luckily we had a spare one lying around from a bathroom project (I may write about this soon!) that we were able to cut to size and shape, and then install within a door frame.
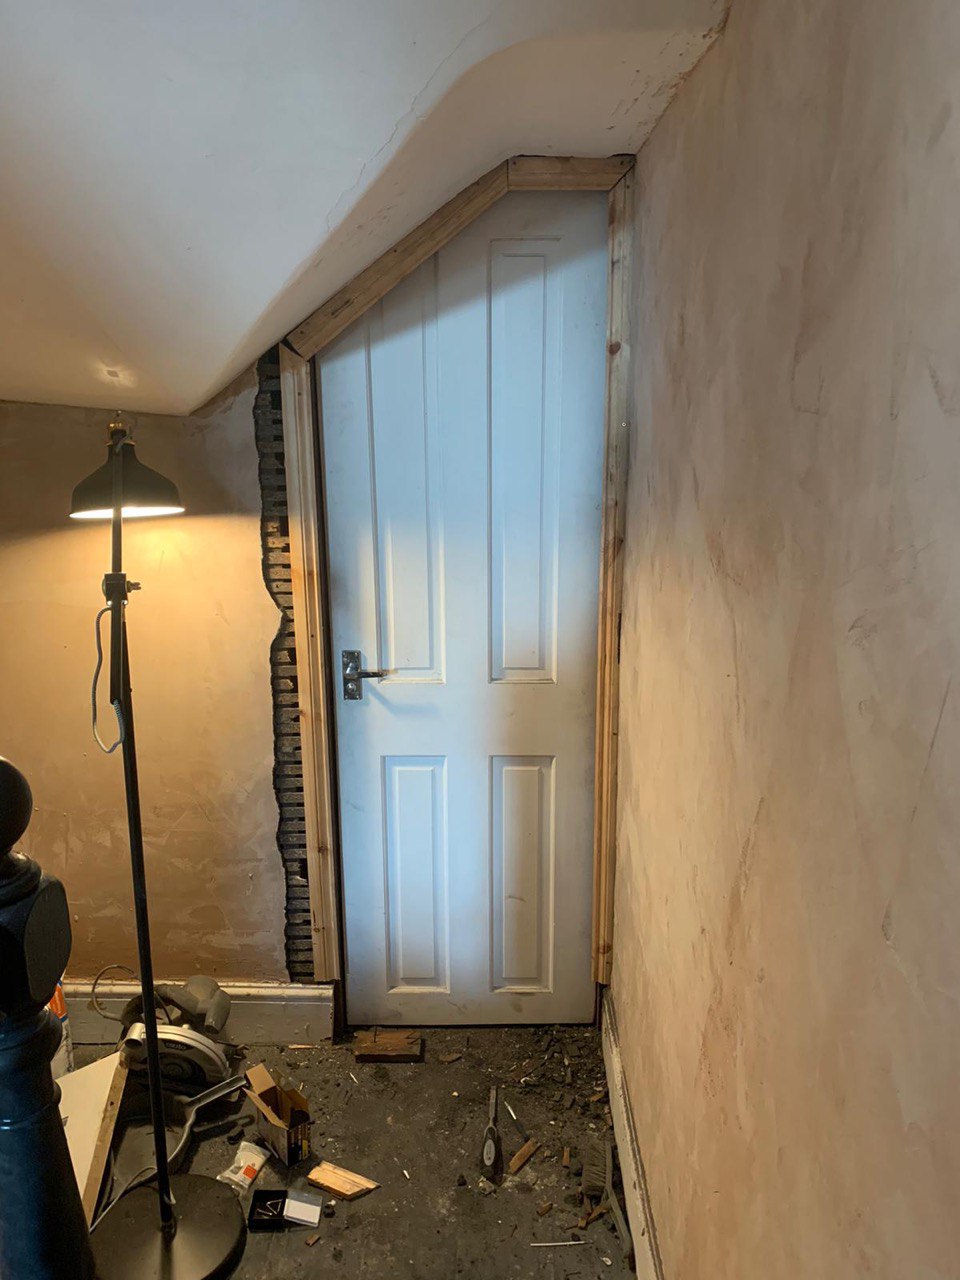
In the image above you can see the original “sticks” (I’m sure there’s a more technical word for these) that form the wall structure. Afterwards we were able to plaster and paint over this, as shown below.
Back to the room
Next we added a floor to the room, insulated the (new) roof space and added plasterboard to form a celiling and wall.
In the image below you can see the new floor and the plastered ceiling and far wall. We added hatches to the wall to provide access to the rest of the loft space now behind this room
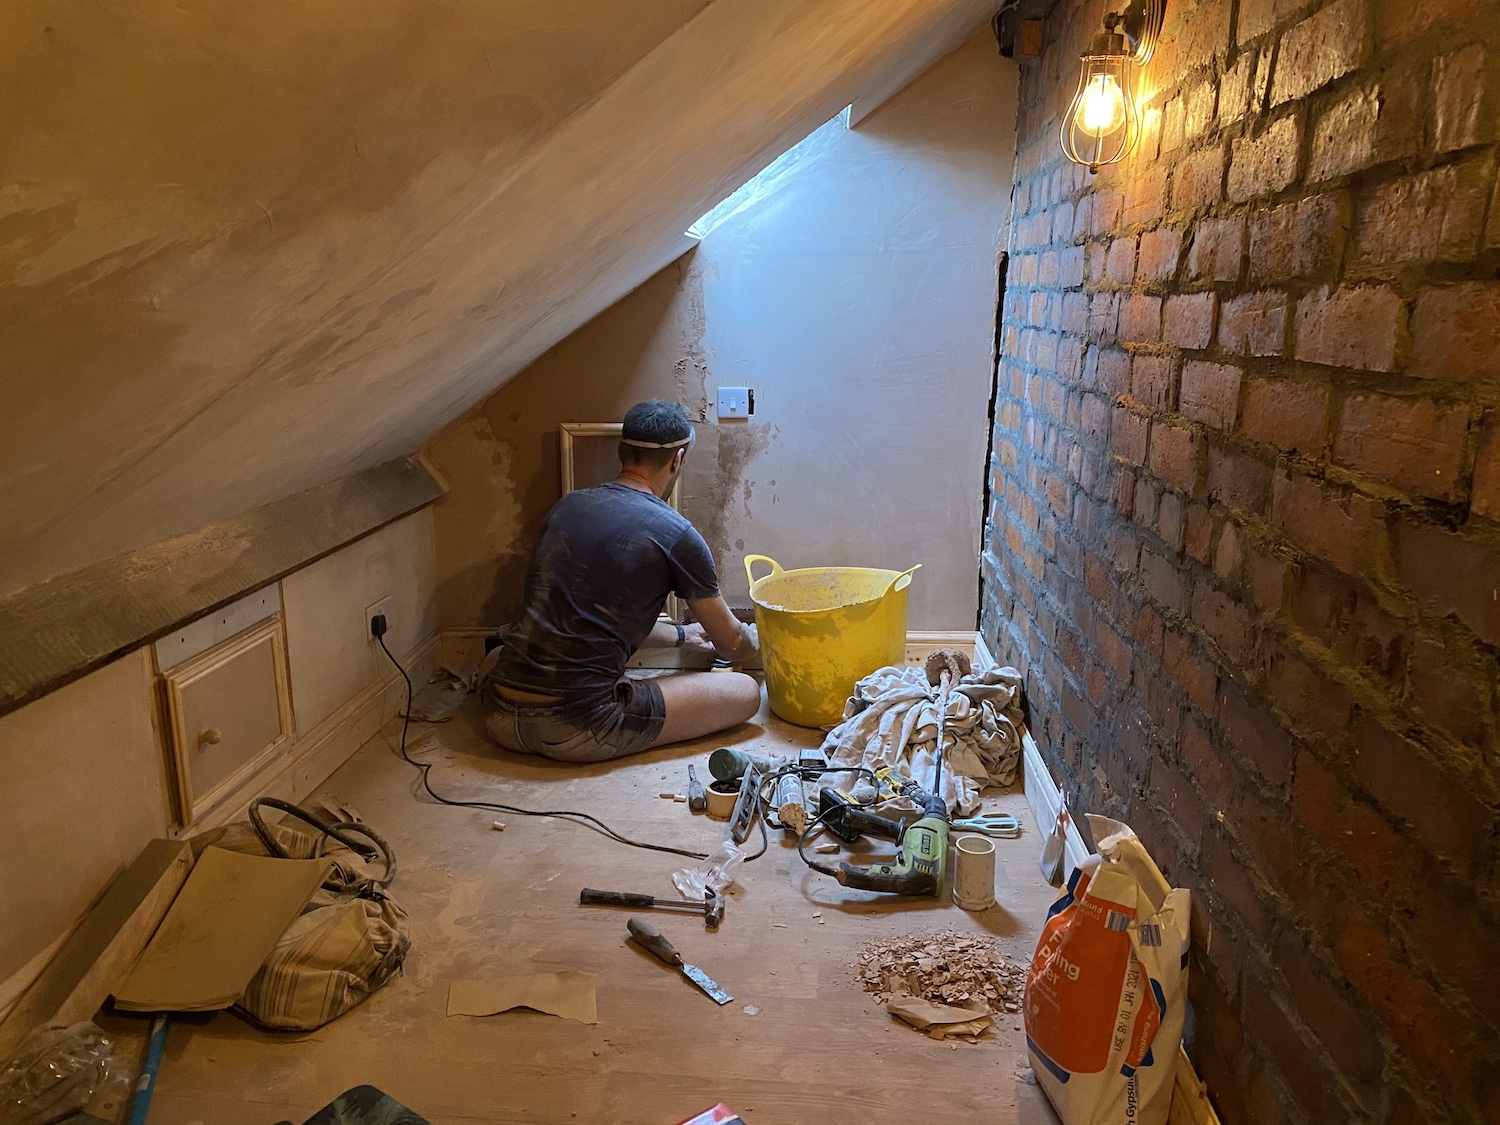
We also hired an electrician to add some nice lighting, switches, and electrical outlets.
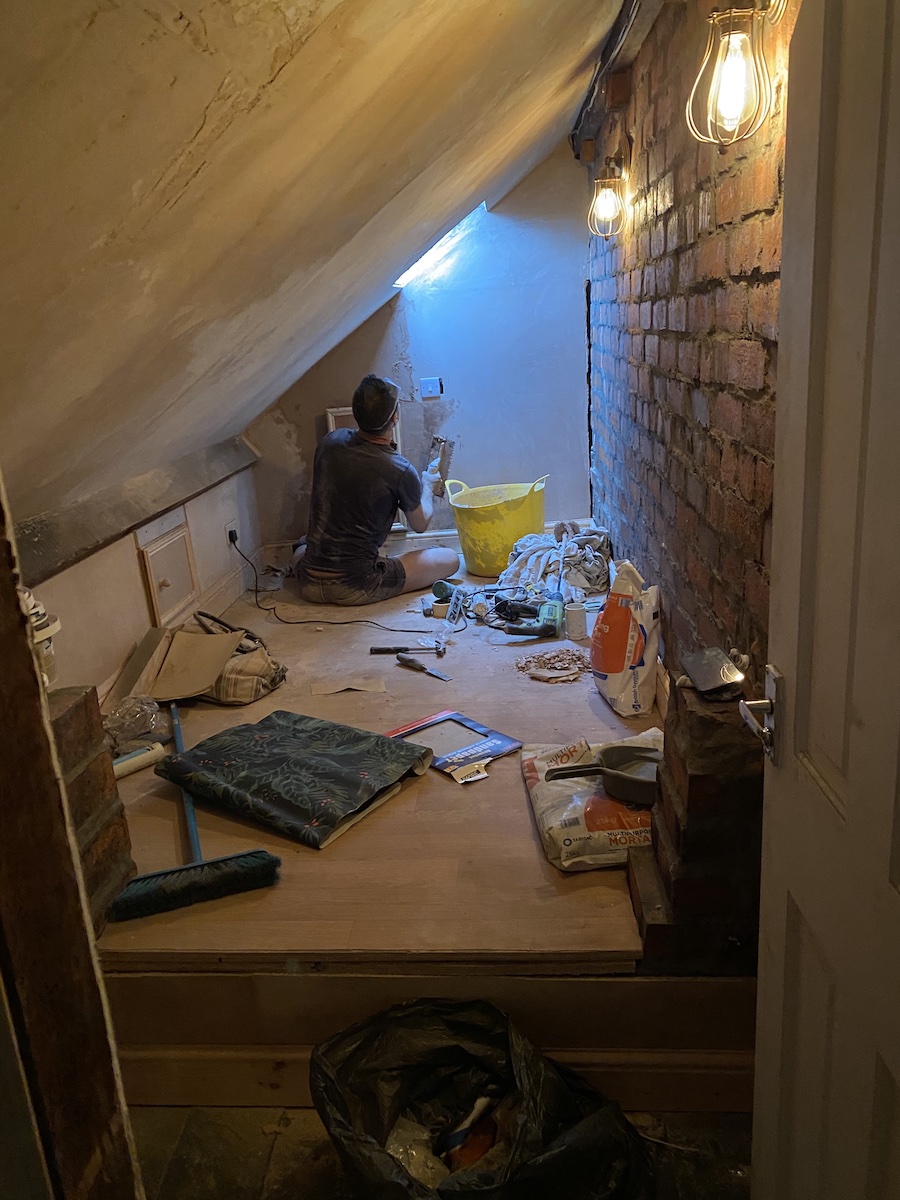
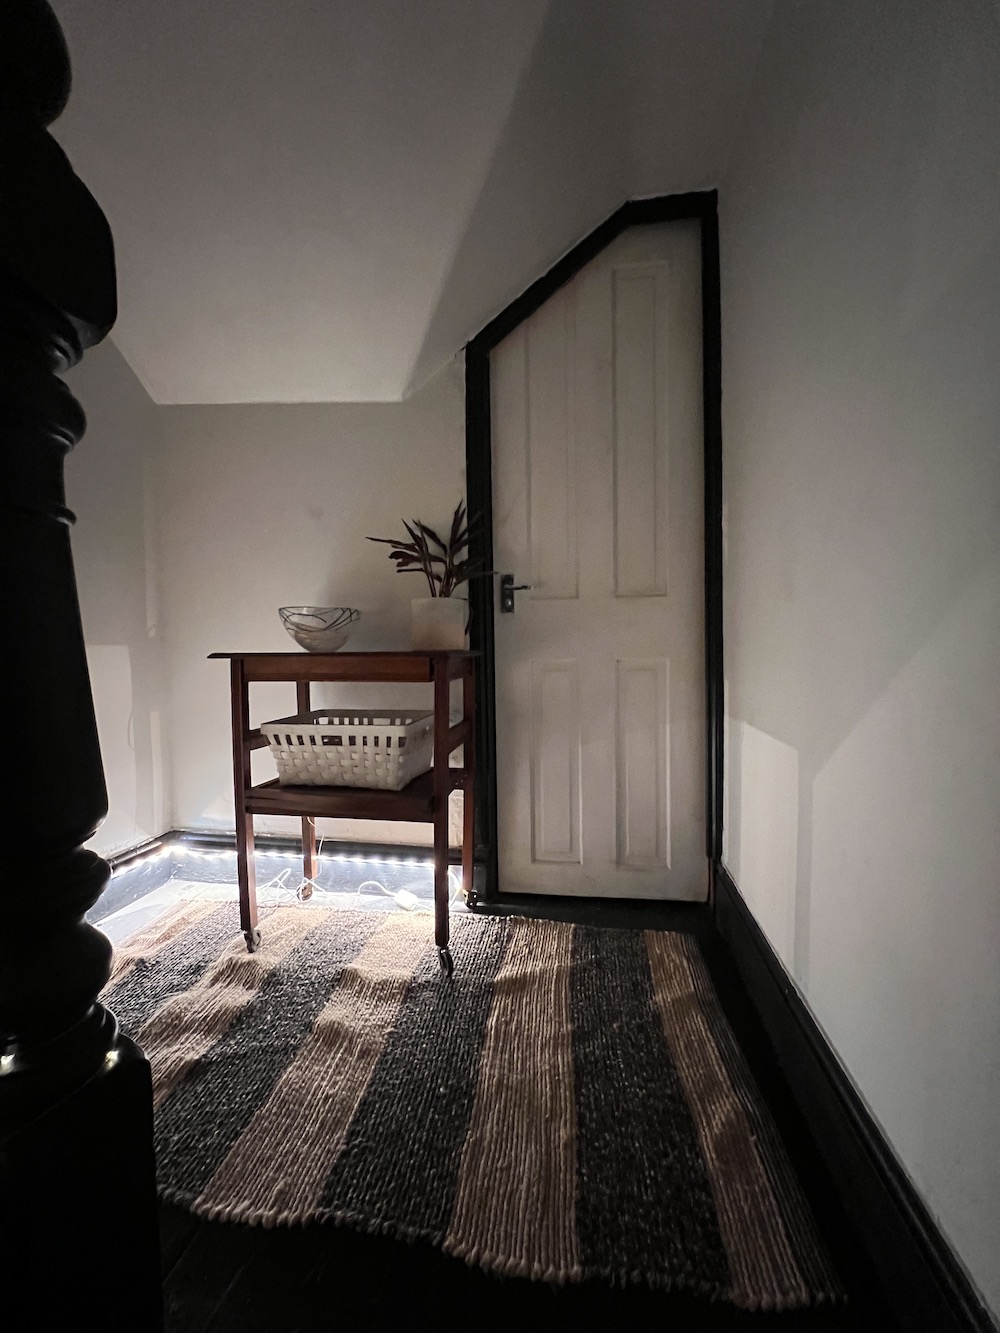
Finishing touches
To finish the room off we washed and coated the brick wall in PVA. This allows us to keep it as an exposed brick wall, but without having dust or dirt coming off from it.
We also painted the walls, ceiling, and beams, and added some wallpaper. We added some flooring, skirting and some shelves. Finally we added some furniture, and the result is below.
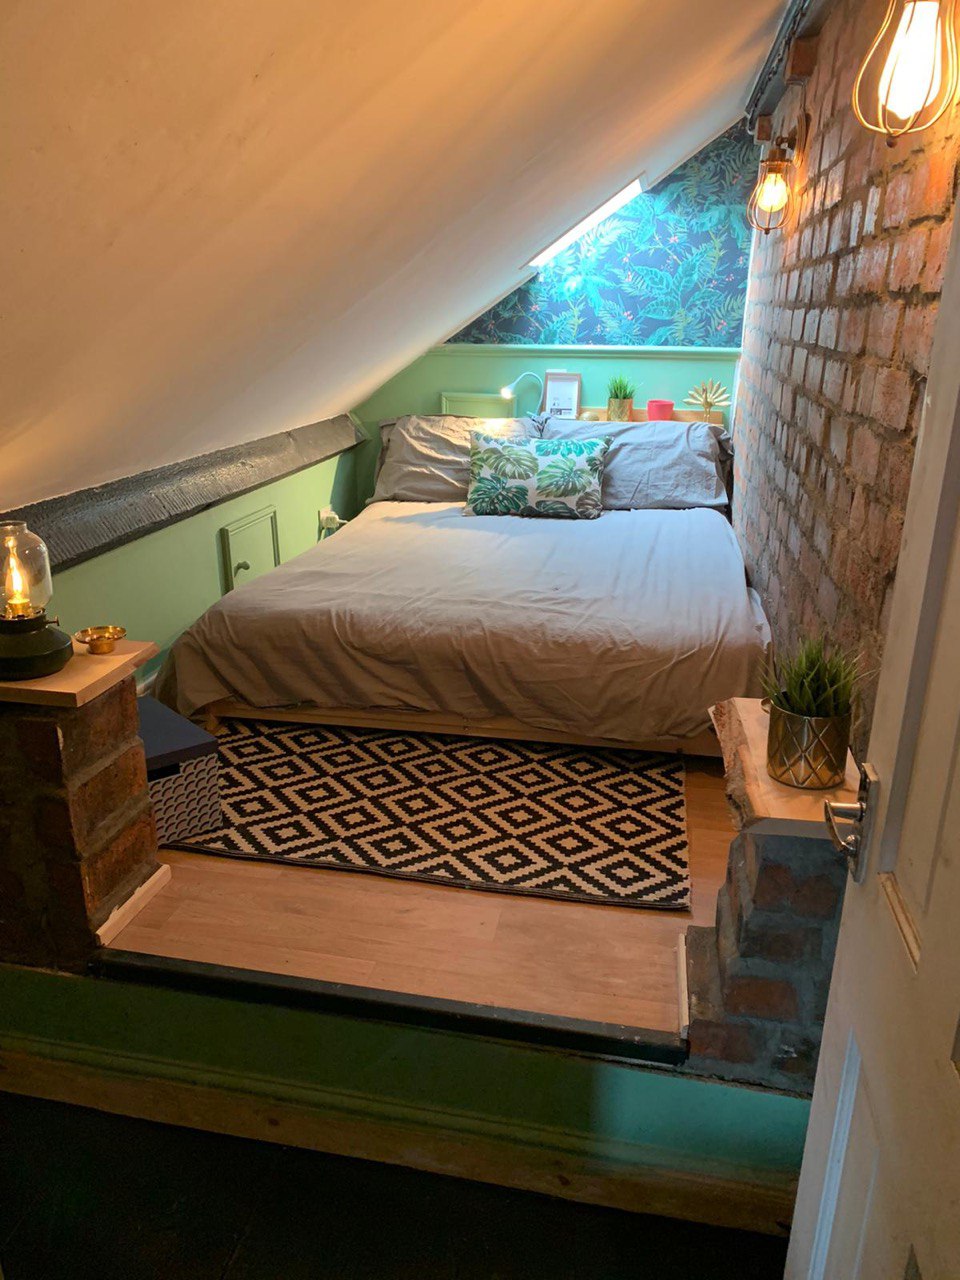
The little window lets through a surprising amount of light. It’s a small bedroom, but it’s cosy and it’s great to have the extra space for when we have visitors!