
Getting and “installing” the nuc
For his birthday a few years back, I bought my (now-)husband a beehive and a honeybee nucleus.
Some might see this as a strange gift, especially given that we live close to the city centre. It was certainly a surprise for him, but given his love for animals and science I knew he would like it.
We were lucky enough to have a relatively large garden, given our location, of around 20 metres in length. Since we didn’t really use the end of the garden much, it was a good location for hive - though other people have successfully kept bees in much smaller areas and on rooftops.
The hive is an Omlet Beehaus, which features two entrances (one on either end). This means that - using the included divider board - one can keep two separate colonies, and the distance between the entrances is sufficient to ensure the bees know which one is theirs.
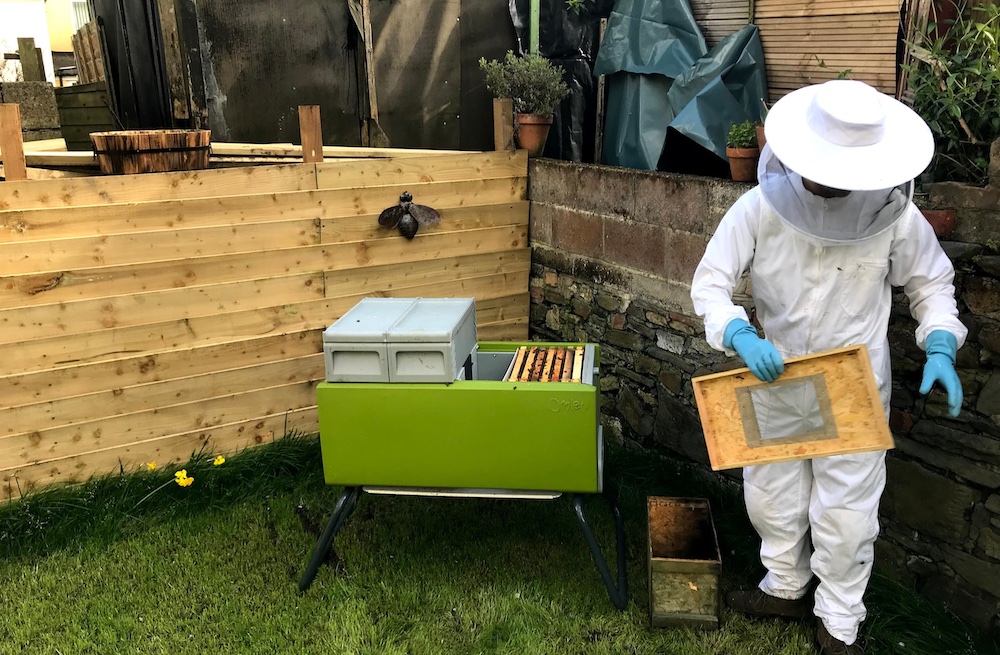
The image above shows the Beehaus hive and the nuc box on the floor. The bees are being added to the right-hand side colony and there is a divider board in place.
I collected the nuc from a farm in Oxfordshire, England - a few hours’ drive from our home. The nuc box had to be kept cool on the way home and the bees also needed water. It was a little disconcerting travelling with a box full of bees!
After we got them home, we moved the bees to the hive by transferring the nuc frames (which are shorter than normal brood frames) from the nuc box to the brood box of the Beehaus.
The queen
Luckily, the queen had already been marked and so she was relatively easy to identify. Each colony has one queen, which is marked by some harmless ink on the back of her body to make her more visible. There is a recognised standard for marking queens based on the year in which they are born - ours was white for “2016”.
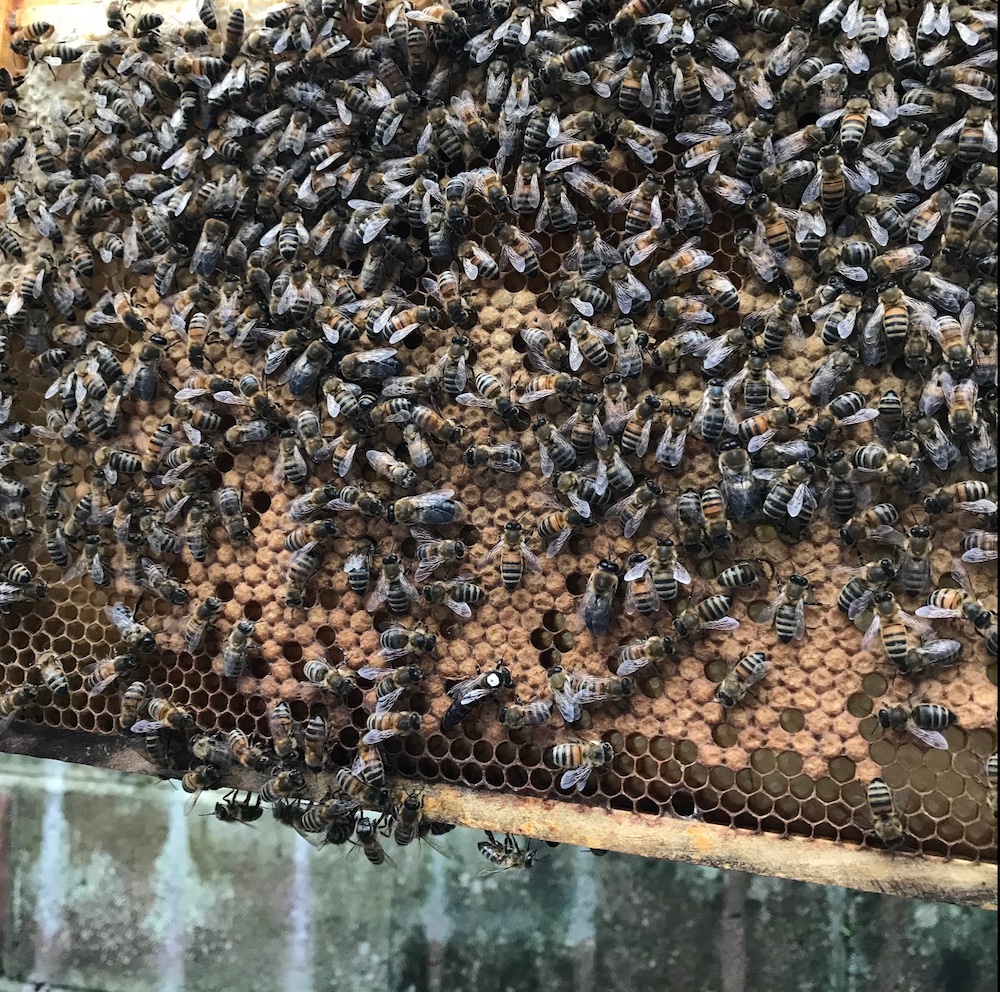
The image above shows a frame of capped brood in our nuc. The white marked queen is visible near the centre bottom of the frame.
Queen bees are extremely important for the correct function of a honeybee colony. They lay the eggs that become new bees, they secrete hormones and other scents that control the colony in various ways, they dictate the mood of the colony, they choose when it’s time to swarm, and much more.
Without a queen present, the bees will try and create a new queen out of an existing larvae at the right stage of development. Without an egg-laying queen, a colony would eventually die out.
Our first queen was lovely. The colony was super-calm (we often wouldn’t need a suit for inspections), there was always a healthy brood, and the honey collection was strong even from the start.
The first few weeks
We got the bees at the start of summer. Since a new colony from a nuc takes some time to get up to full-size, it was unlikely that they’d swarm the first year. Swarms take place in the summer months, but only if certain conditions are met.
This was good, as it gave us a year to get the hang of things before having to deal with a swarm!
Over the first couple of months, the colony grew in size and we gradually swapped out the nuc frames for full-size brood frames in order to give the bees space to grow (i.e. create the cells for storing eggs, larvae, pollen, and honey).
The workers (female bees) were out in full-force collecting pollen, and the drones would do their thing (usually nothing) back at the hive.
Workers can travel a good few miles on a single trip, and gradually travel further out as they learn the local area. Due to this range, it isn’t recommended to move bees within a few miles of their established location, since when they leave the hive there is a good chance they will recognise the area and travel back to where the hive used to be.
Bees can be quite sensitive to changes in the hive location, with the general rule being to move the hive only less than one metre OR more than six miles.
Social factors
We worried that the neighbours might be a little nervous about a colony of bees so nearby, but actually they seemed to really enjoy it. They often asked us about it and planted flowers especially!
This felt really positive given current worldwide efforts in conserving bee populations.
One of our neighbours also had a pond, which was great as it allowed the bees to drink (they don’t like to drink water from sources too close to their hive).
Generally, bees aren’t interested in people at all. They would only become aggressive if they feel their colony is under threat, and so finding a bee out in the wild or a few metres away from the hive is pretty safe. Bees usually travel quite quickly about 10 metres above the ground, and would usually only descend when collecting pollen or when returning to the hive.
Adding the “supers”
We were able to add the shorter “super” frames after a couple of months. It was a long summer, and the bees continued being quite active long into September and beyond.
Super boxes and frames sit on top of the brood box (you can see two in the photo above), and there is a “queen excluder” board that sits between the supers and the rest of the hive. The excluder features holes that allow workers through to deposit honey into cells in the super frames, but are too small for the queen to get through.
This is useful for harvesting honey, as the eggs and larvae and pollen stay below in the main brood box. The workers take the excess honey into the super frames, which can be easily withdrawn without disturbing the main hive.
Bees collect more than enough honey and place most of it in their main brood box, which we do not remove. It is only the excess honey which is taken.
First harvest
We got our first harvest late in the summer. Cities are full of lots of different types of flowers and plants, since every garden is different, and the vibrant gardens were clearly very attractive to the bees!
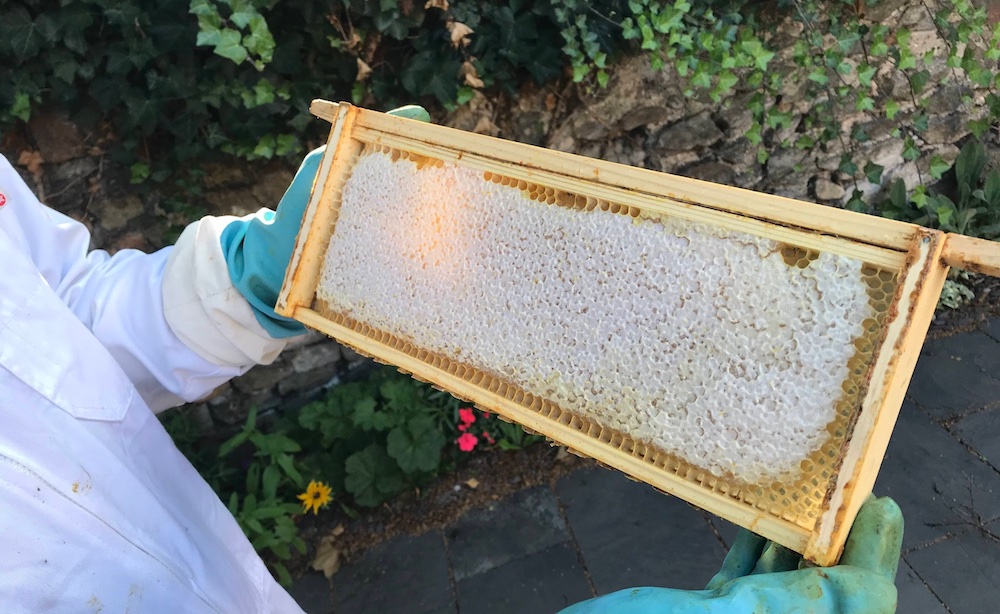
The image above shows a super frame full of capped honey ready for harvest.
We checked the supers every week as part of our normal inspections, and eventually decided that the supers were full enough to harvest. The supers, when full of honey, are heavy, which is very satisfying! The honeycomb structure is effective: a single frame could easily hold several jars’ worth of honey.
We extracted the honey by carefully scraping the comb away from the foundation sheet. This gave us a bowl full of honey and wax from the comb, which we strained through cloth into jars. We kept the wax and later purified it - we still haven’t done anything with this growing collection of wax!
Once harvested, the empty frames were re-added to the supers to allow the workers to rebuild the comb and continue honey production.
Winter
As the days got colder, the colony began to naturally shrink in size. We removed the supers and gradually reduced the number of frames within the brood box. This helps the bees maintain their own internal temperature during the winter.
During the winter there is no way for the bees to collect additional food. They can feed off the honey they produced during the warmer months, but we helped them along by feeding them. This can be done by making a sugar solution and placing this in a “contact feeder” upside-down in the hive.
We checked the bees less during the winter. This helps prevent the cold air getting in when opening the lid.
Spring and swarm watch
In spring, the days began to get warmer again, which was marked by more bee activity around the hive entrance. We gradually re-added frames as the colony began to increase in size again.
As the months progressed we kept an eye out for signs of bee swarming. This can be fiddly business, but there are a number of indicators you can use. The most obvious indication of a colony preparing to swarm is the presence of queen cells in the brood frames.
Queen cells are created by workers when it is time to create a new queen. It is done by elongating a normal worker (female) brood cell outward and feeding the larva royal jelly (a special kind of honey) as it develops. This jelly makes the bee larva grow bigger than a normal bee and with the characteristics of a queen.
Queen cells are obvious to see, and usually show near the bottom of the frame. I don’t have any photos myself but there are lots if you search the web.
Once a queen cell has been capped (i.e. sealed off for its final development), it is likely that the colony will swarm within the next couple of days.
Swarm control
Swarms are part of the natrual honeybee colony lifecycle, and usually occur every year in healthy colonies. A swarm signifies the division of a colony: the old queen flies away with most of the colony, leaving some bees behind (workers and nurse bees, as well as drones) along with the soon-to-hatch queen(s).
A swarm is quite an intense process, and involves lots of loud flying bees as the hive gradually empties. However, a bee swarm is actually pretty safe: the bees are often at their most docile when in a swarm.
There are many ways one can prevent an all-out swarm. Swarm control is definitely recommended in a city to avoid concerning neighbours.
Some people clip the wings of the queen to prevent her from being able to fly (the colony won’t fly away without her). Others carry out an “artificial swarm” - this is what we opted for.
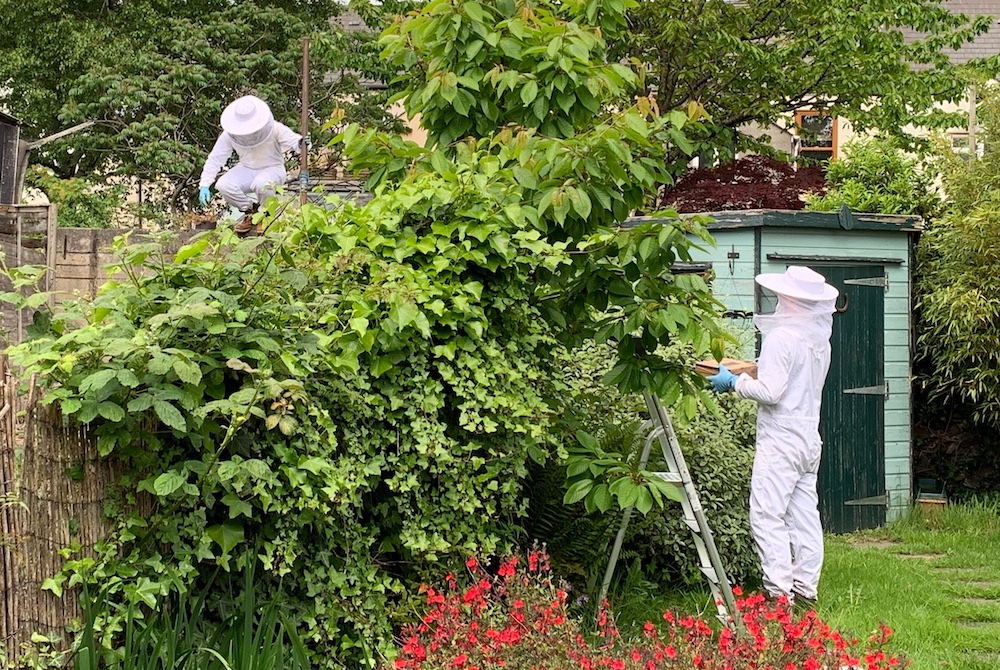
To artificially swarm the bees, we took some of the brood frames of honey and pollen from one half of the Beehaus and placed them in the other half - making sure the queen was also transferred.
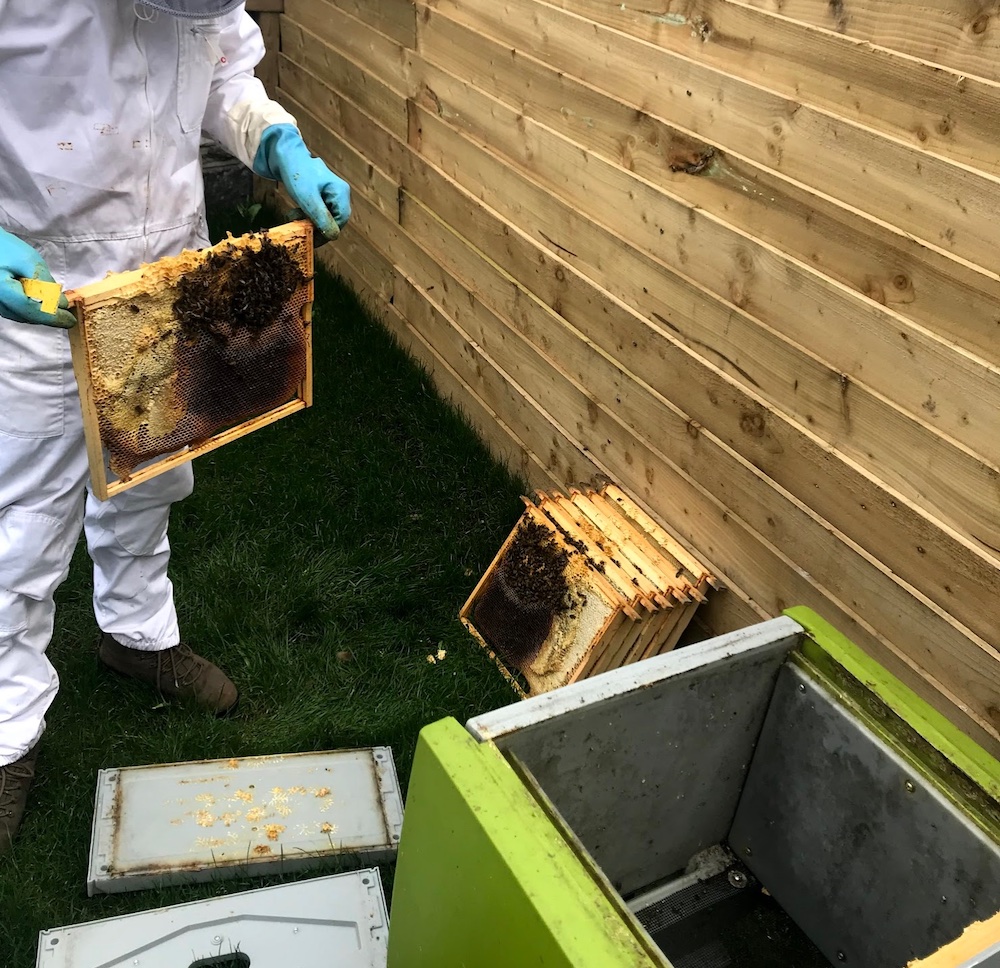
The image above shows us selecting frames for transfer to the new side of the hive to artifically swarm the colony.
This left us with two separate colonies - the existing one containing the “new” bees with a few frames of brood, the queen cells, and some pollen and honey, along with some remaining workers, drones, and nurse bees. Importantly, the new colony does not have a current queen.
The “swarmed” colony on the other side of the Beehaus contained the existing queen, plus many of her workers, drones, and frames of pollen and honey and - importantly - no queen cells! This will now trick the queen into thinking she has already swarmed: it is a “new” hive, no queen cells around or brood. She can begin the process again of egg laying as before.
The two colonies
The “swarmed” colony continued to grow as before. The existing queen gradually continued laying to get the colony back up to size. We were able to place supers back on that side not long after.
In the “new” queenless colony we removed all but two of the queen cells. After a few days she emerged and went on her mating flight. During this flight she mated with a drone and returned to the hive. Shortly after she began laying and started her other queenly duties.
We were lucky in that the process worked quite smoothly. Sometimes, the first queen to emerge will explore the hive and sting any still-to-emerge queens through their cells to ensure she is the only queen. If two queens hatch at similar times, they can fight. Either way, there can only be at most one queen. If the queening is unsuccessful for any reason (e.g. they die when fighting or if they fail to emerge from their cells) the colony can be requeened by purchasing a new queen from a farm.
Uniting the colonies
Having two colonies is fine if you are a commercial beekeeper with lots of space. However, colony division would mean that we would eventually have four, eight, sixteen colonies, and so on as they continued to swarm and divide year on year.
We only really wanted one colony, and having the spare half of the Beehaus is useful for ongoing bee maintenance. As such, we opted to unite the colonies.
Uniting a colony involves getting rid of one queen and then gradually bringing the colonies together. Given the success of the first queen we had (both in terms of bee temperament and honey production), we chose to keep our old faithful.
To unite the colonies we first of all removed the new queen (I won’t go into the details here). We then modified the divider board between the two halves of the hive to add a sheet of paper. The bees belonging to the new queen would recognise an entirely different set of scents and hormones, and require a slow introduction to our older queen.
Adding the paper allows the various chemicals to gradually filter through as the bees on either side eat through. This gradual process allows bees on both sides to become accustomed to each other and to allow the now-queenless bees to get used to their new queen.
Eventually the paper is gone, and we were able to move the frames all back to one side of the Beehaus as before.
The second year
After the swarming and re-uniting, the bees carried on much the same as the first year. We had several great harvests from some very productive bees!
Swarm un-control
In our third year, we again looked out for the signs of swarming but we must have missed a trick. One day I noticed a huge amount of activity around the hive and realised what must have happened. There could have been less obvious queen cells present, or perhaps the existing queen just decided to leave early.
Either way, the bees were definitely properly swarming. Luckily, it was a weekday and so nearly everyone around was at work or at school (we worked from home at the time). We could see the bees congregating around a tree in a nearby garden - this must have been where the queen was.
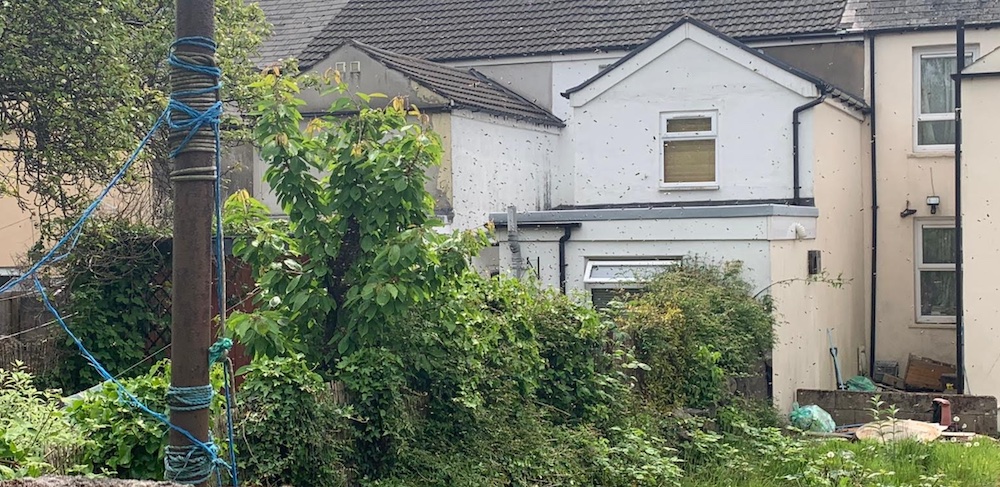
The image above shows bees swarming and a mass of bees gathering around a small tree trunk.
The swarm was very noisy. We knew we didn’t really have long to try and get the queen and the rest of the bees back (they would return home once they knew the queen was no longer there). We didn’t want to just go into someone else’s garden without permission, and so I went round to introduce myself. Luckily they were home, and were very understanding.
They let us into their house and garden and we were able to scoop the mass of bees into a shoebox. There was too much activity to identify the queen, but we just hoped we had her.
We transported the bees over the wall to avoid carrying them through the house.
Success!
We were able to get the box back to the hive and emptied them back inside. We removed any of the queen cells we could find. We closed the lid and hoped the ordeal was over.
Luckily, the activity died down over the rest of the day, and the bees resumed normal activity over the next few days. All of the drama was clearly enough to convince the queen that she had already swarmed, and she was happy to resume business as usual.
Continuing on
The rest of our beekeeping adventure was much less exciting. We got stung a few times (mainly through the gloves), but nothing serious or anything to write home about. We now have a new queen from a more recent swarm.
Other than the swarm mistake we made, the bees did not bother our neighbours. They enjoyed having the bees around and actively engaged with us and them.
We definitely learned a lot (and still continue to). It feels great to help support the bee preservation movement, and they are probably some of the most interesting animals on the planet.
If you are interested in bees, have some space and some easy-going neighbours, I can definitely recommend giving it a try. You can also join local beekeeping societies to join a wider community, and everyone is very supportive!