
For a couple of years now I have been using a self-hosted Nextcloud as a replacement for iCloud and Google Drive. I won’t go into the details as to why (especially given the additional upkeep and other overheads required), as this has been covered before - but mainly it’s about maintaining control over my data.
I use a cloud VPS to host my Nextcloud instance - rented from Linode, whom I can certainly recommend if you’re looking for a good VPS provider - and since starting my Nextcloud journey I have begun hosting a number of additional services on the same server. For example, FreshRSS (which I consume using Reeder), Monica, Gitea, a Matrix server, and more.
Considering the pervasiveness this one machine has with respect to my data and day-to-day life, and the impact it would have if I were to lose access to it, having backups for it is crucial.
3, 2, 1, Backup!
Linode offers a backup service for servers, which takes periodic snapshots in order to enable easy recovery of a service, or lost data. That’s one layer, but what happens if Linode itself experiences problems or if I lose access to my account for any reason? Having all of the live data and backups tied to a single provider was definitely a worry for me.
Many people follow the “3-2-1” rule for backups. This strategy is concerned with - for any piece of data - having at least three copies of that data, two of which stored locally but on different media, and another copy somewhere else (geographically separate).
Enabling Linode backups allows me to comply with the “3-2” bit of the rule. However, by stopping at this point there is no additional off-site backup in case of catastrophic failure.
Finding my “1”
In order to fully meet the needs of the 3-2-1 strategy, I needed to find a solution for maintaining off-site backups. Additionally, this wouldn’t be a one-time backup; ideally I’d need something that could at least back things up on a daily basis (if not more frequently).
I began researching solutions, but it wasn’t long until I settled on Backblaze B2 - an S3-compatible object storage solution that has great GB/$ pricing. Side note: Linode also offers S3-compatible object storage, but that wouldn’t help me in this scenario as it’d still be managed by the same provider.
B2 is cheaper than S3 itself, and also has the benefit of not having to maintain a complex AWS account for simple personal projects.
Setting up backups to B2
Setting up the backups involved a few simple steps:
- Creating a new Backblaze B2 account
- Setting-up a bucket on B2
- Writing a script to automate the backup to the B2 bucket
1. Create a Backblaze account
You get 10GB free on Backblaze. Head over to the sign-up page in order to create your account.
2. Set-up your bucket
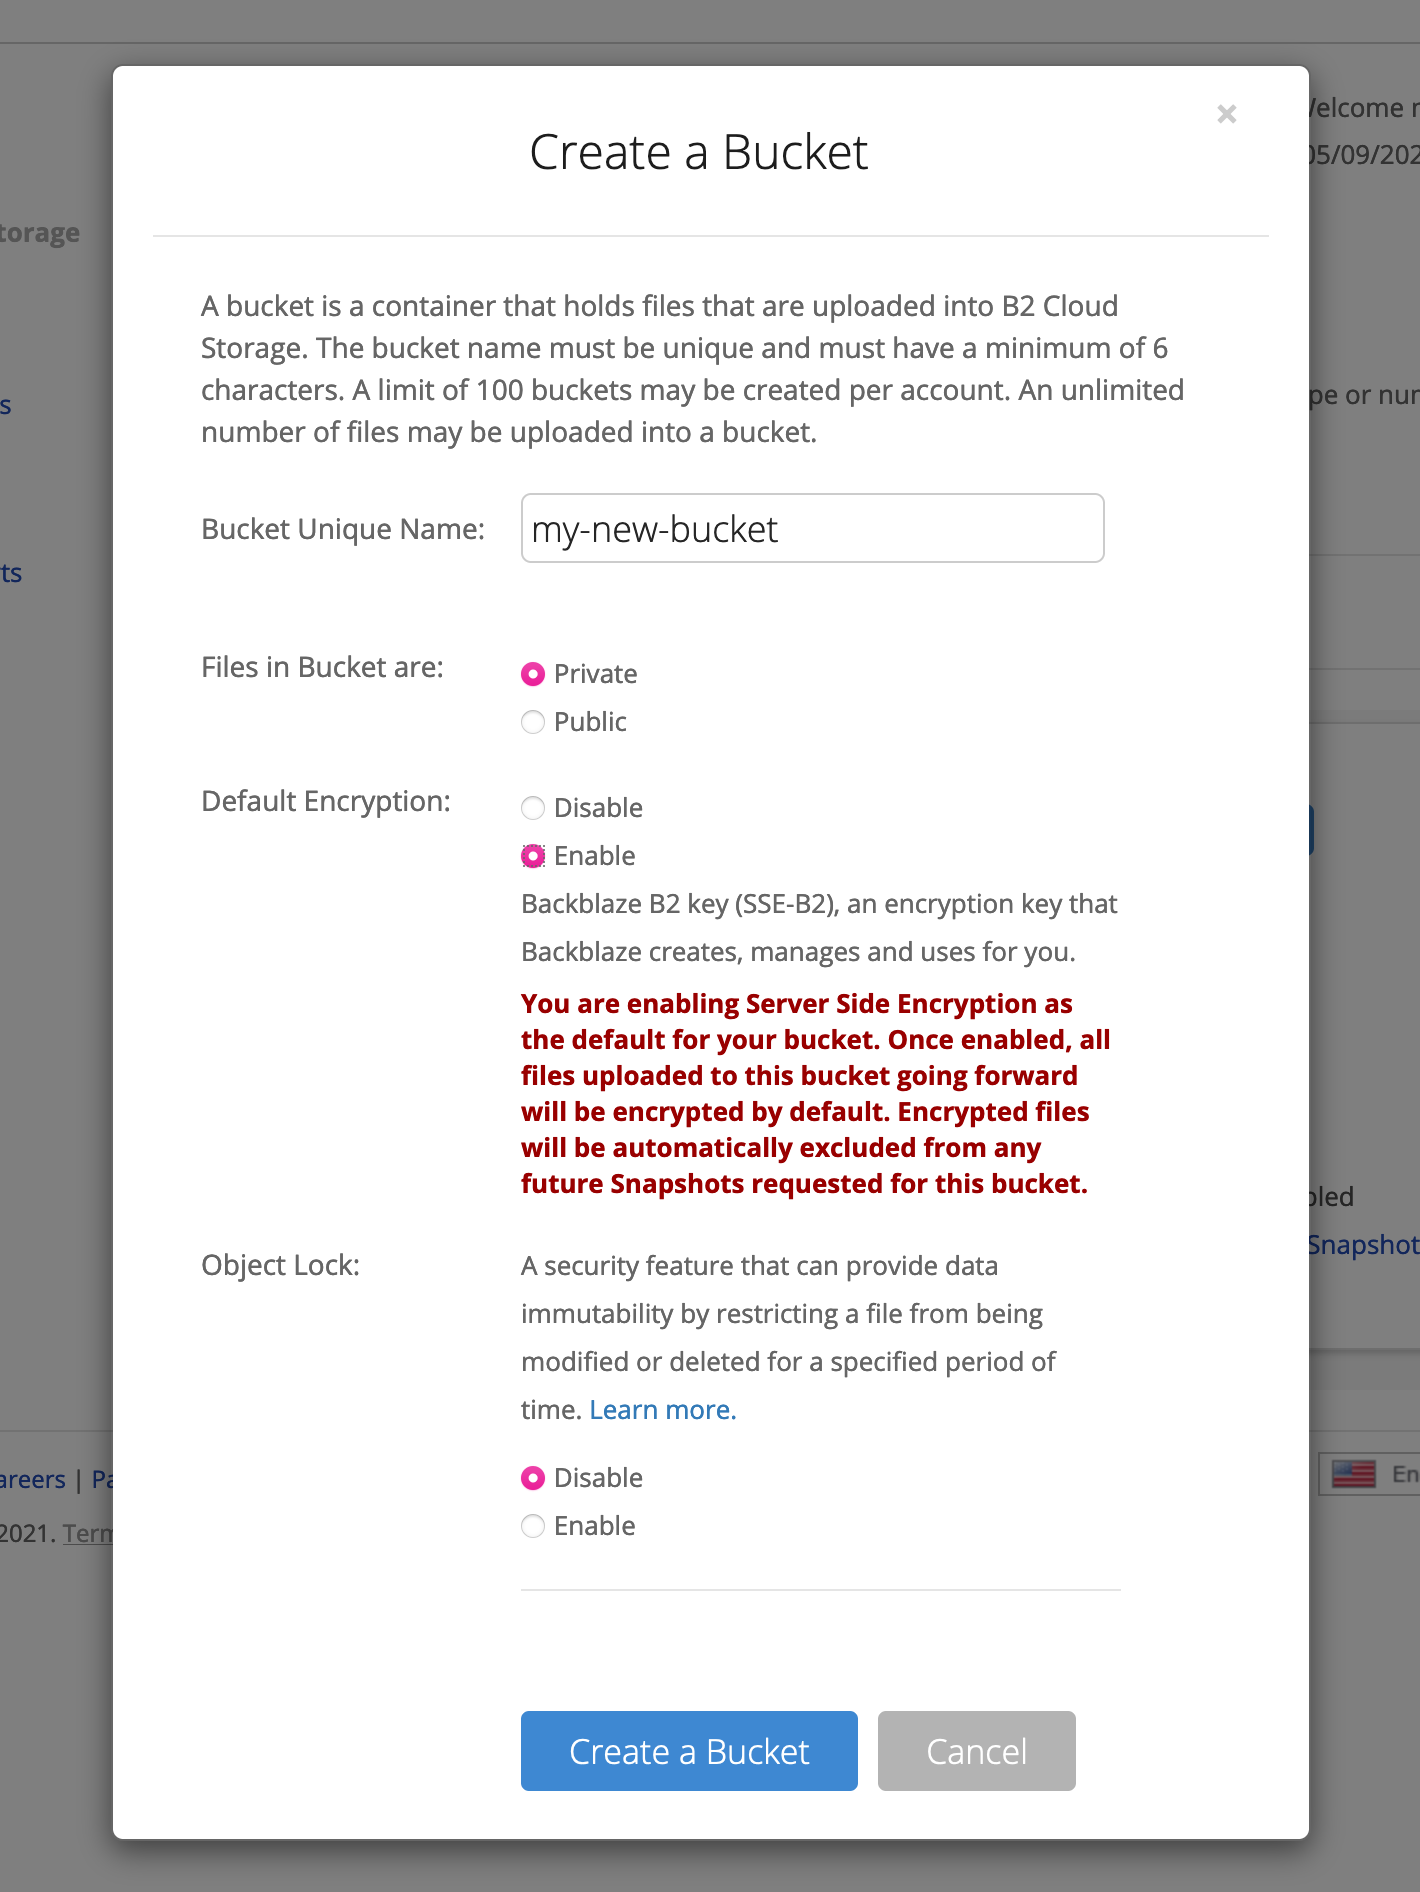
Once you’ve got your account and have verified everything, go to the “Buckets” tab of your Backblaze account’s UI, and click “Create a bucket”. This will open up a dialog.
Enter a unique name for your bucket and ensure you mark files as “private”. I also turned on default encryption for an extra level of security. When ready, click “Create bucket”.
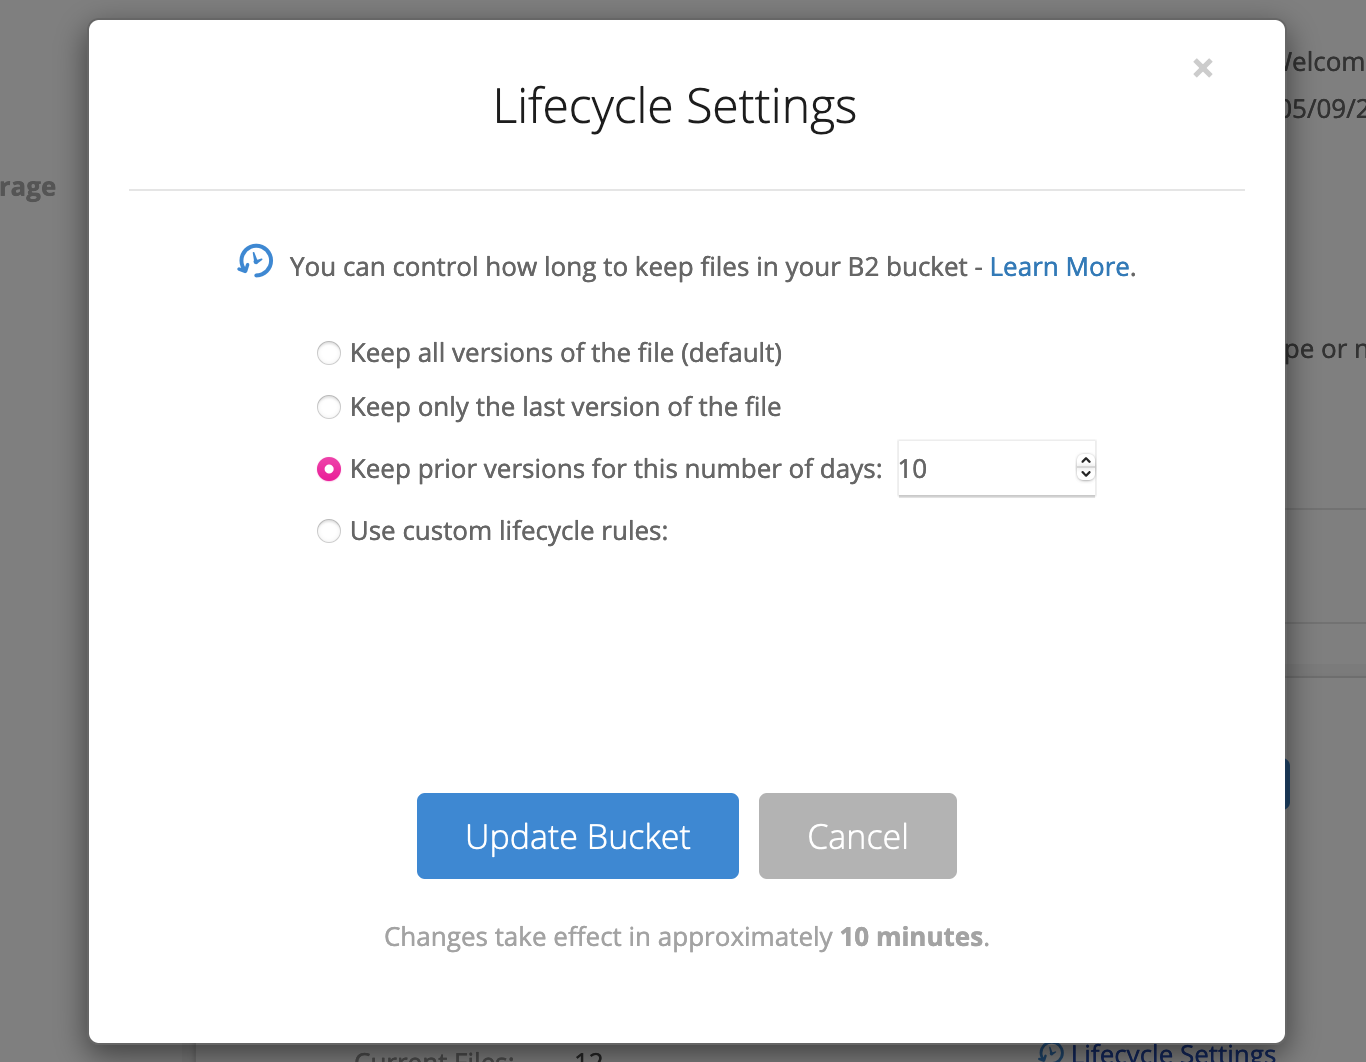
Since we will be periodically backing-up data to this bucket, the bucket will quickly take up more and more space (and cost you more too). As such, I recommend adding a lifecycle rule to tell B2 to automatically delete “old” backup files. To do so, click the “Lifecycle Settings” option on your new bucket, and configure how long you want to keep old file versions around for (I used 10 days):
Finally, we need to create some credentials that will enable the backup system to write files to the bucket. Go to the “App Keys” tab of your B2 dashboard, and click “Add a New Application Key”. On this dialog, name your key and ensure this key can only write files to the bucket. You may also want to restrict this key to only work with your specified bucket.
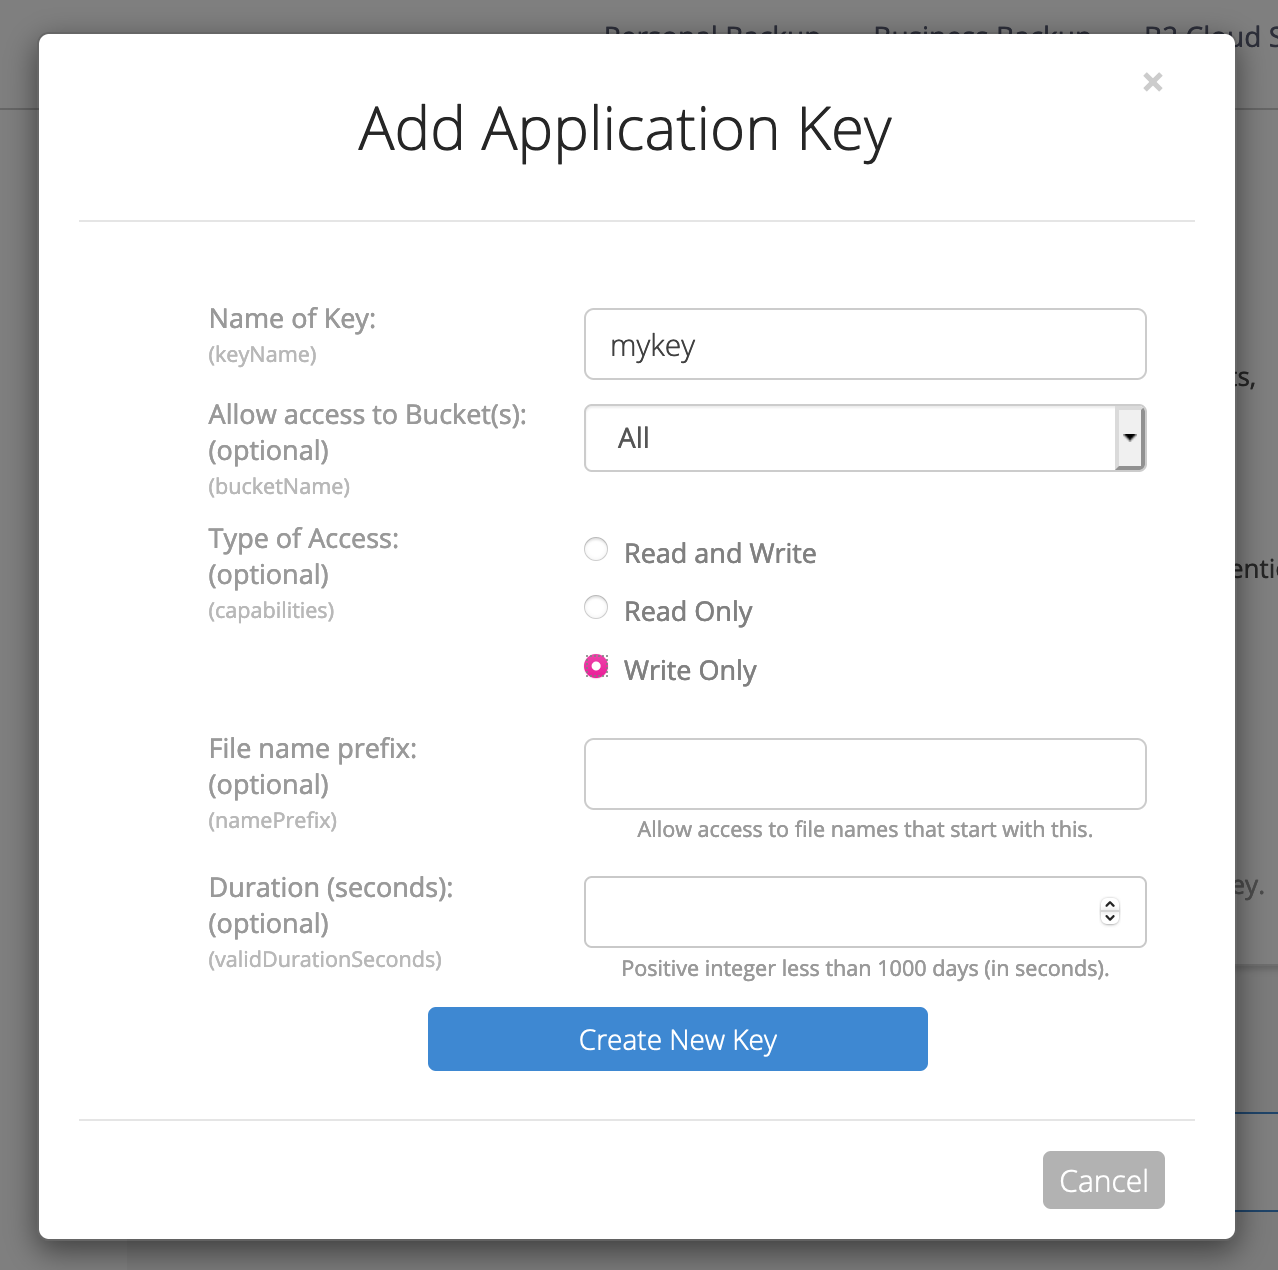
Make a note of the keyID and applicationKey that will be displayed (as well as your bucket’s name and the “endpoint” shown on your bucket), as you’ll need these later.
3. Write a backup script
Backblaze does have an API for managing buckets and files, but using this (especially for larger files) felt overly complex. Since B2 is S3-compatible, we can just make use of standard S3 tools, such as awscli.
As such, my script for backups simply creates a tarball containing all of the directories and files I want to backup, and then sends it to B2. This can be as simple as the following:
#!/bin/bash

tar --warning=no-file-changed -czf /tmp/backup.tar.gz /first/path /second/path
aws s3 cp /tmp/backup.tar.gz "s3://$BUCKET/backup.tar.gz" --endpoint-url "$ENDPOINT"
Before running the script, ensure that the following environment variables are set:
AWS_ACCESS_KEY_ID(set to thekeyIDof the B2 key you created)AWS_SECRET_ACCESS_KEY(set to theapplicationKeyof the B2 key)BUCKET(the unique name of the bucket you created on B2)ENDPOINT(the endpoint shown on your bucket on the B2 UI: similar tohttps://s3.eu-central-003.backblazeb2.com)
If these are correctly set (and dependencies like awscli are installed), you should be able to mark the script as executable and then run it to backup the directories /first/path and /second/path (obviously change these to real paths on your server, and you can always add more).
You can verify the upload was successful by browsing the bucket on the B2 interface. Please note it can sometimes take a few minutes for files to show up!
Note: I use the --warning=no-file-changed flag to prevent tar from warning about files that change during the tarball creation process (this happens to me because I backup my Matrix server files too, which change quite frequently as new messages arrive).
Automatic backups
The above setup is useful for one-off backups, but I wanted to automate the process. This could be as simple as a cron job, but I like Dockerizing things (this makes the environment variables easier to manage too).
To see my approach to automating the backup, feel free to clone and use the Docker image at this repository.